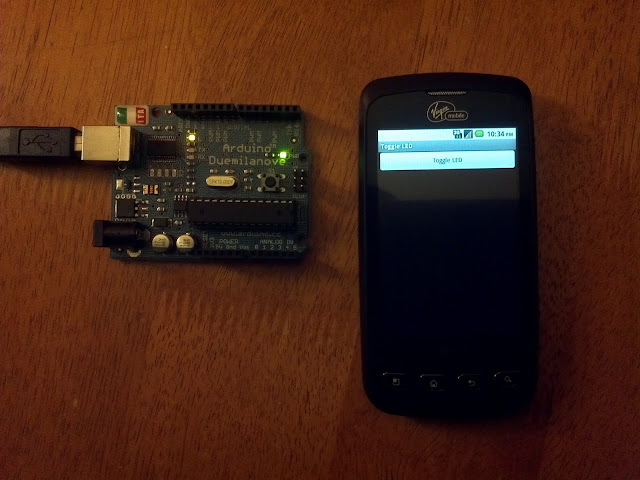
Android with "Toggle LED" app next to an Arduino duemilanove
"If you can blink an LED you can do anything", I don’t know who said that but I hear it a lot whenever people ask what they should do first to learn to program microcontrollers, and it’s true! So in this tutorial I will will show you how you can blink an LED with your Android app from anywhere where your phone has internet connection.
Here is the result of what you’ll be making.
If you understand everything that is going on in the code presented in this article it is not hard to see how the code can easily be modified to control anything with your phone from anywhere in the planet where your phone has an internet connection.
Requirements:
- a server running PHP at your house ( the set up depends on your internet service provider so that is not covered here)
- an arduino
- an android device (phone or tablet)
Server Side Code
This is the code in your server that will receive the data from your phone and send it to the Arduino. Make sure that you change the COM port to the COM port you are using.
<?php
require_once ("php_serial.class.php"); // include the php serial class
$data=(int)$_POST["message"]; // get the message from the phone
$serial = new phpSerial();// create a serial object
 // specify where you want to send the data to (where the arduino is connected in the usb ports)
$serial->deviceSet("COM4");
$serial->confBaudRate(9600);// the transfer data rate of your arduino
$serial->deviceOpen();// start the communication
$serial->sendMessage($data); // send message to arduino
$serial->deviceClose();// close the serial connection
?>
download the PHP serial class file from here http://www.phpclasses.org/browse/file/17926.html
Arduino Code
This code receives the value from the server code, if the value matches the expected value from the app the led will toggle. Am using the Arduino’s built in LED on pin 13. The code the app will send is the value "1", in the Arduino "1" is equal to 177, that’s why am checking for 177 in my switch statement.
int ledPin=13;
int state=0;
int data=0;

void setup()
{
  pinMode(ledPin,OUTPUT);
  digitalWrite(ledPin,state);
  Serial.begin(9600);
}

void loop()
{
  Serial.println(data);
  if(Serial.available()>0)
  {
    state=!state;
    data=Serial.read();
    switch(data)
    {
      case 177:
        digitalWrite(ledPin,state);
      break;
    }
  }
}
Android App Code
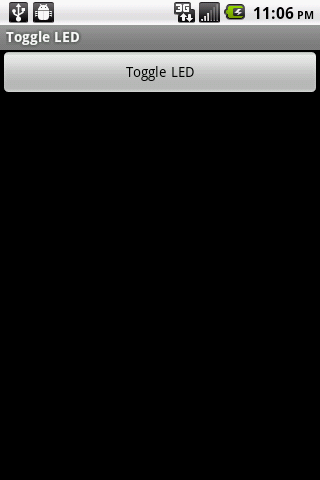
The app will look like this:

Android LED app
Make a standard app in eclipse and call it helloworld.
HelloWorldActivity.java
Remember to replace com.yoursite.helloworld with your package name. You could use "id" parameter in your PHP code as well, this is not implemented here, we’re only receiving the contents of the parameter "message" which in this case is the value "1".
package com.yoursite.helloworld;

import java.io.IOException;
import org.apache.http.client.ClientProtocolException;
import java.util.ArrayList;
import java.util.List;
import org.apache.http.client.HttpClient;
import org.apache.http.client.methods.HttpPost;
import org.apache.http.impl.client.DefaultHttpClient;
import org.apache.http.NameValuePair;
import org.apache.http.client.entity.UrlEncodedFormEntity;
import org.apache.http.message.BasicNameValuePair;
import android.app.Activity;
import android.os.Bundle;
import android.view.View;
import android.widget.Button;

public class HelloWorldActivity extends Activity {

    Button sendButton;
    /** Called when the activity is first created. */
    @Override
    public void onCreate(Bundle savedInstanceState)
    {
        super.onCreate(savedInstanceState);
        // load the layout
        setContentView(R.layout.main);

        sendButton = (Button) findViewById(R.id.sendButton);

    }
    // this is the function that gets called when you click the button
    public void send(View v)
    {

	  HttpClient httpclient = new DefaultHttpClient();
          // put the address to your server and receiver file here
	  HttpPost httppost = new HttpPost("http://yoursite/yourPHPScript.php");
          try {
	         List<NameValuePair> nameValuePairs = new ArrayList<NameValuePair>(2);
                 // we wont be receiving the parameter ID in your server, but it is here to show you how you can send more data
	         nameValuePairs.add(new BasicNameValuePair("id", "12345"));
                 // message is the parameter we are receiving, it has the value of 1 which is the value that will be sent from your server to your Arduino board
	         nameValuePairs.add(new BasicNameValuePair("message", "1"));
	       httppost.setEntity(new UrlEncodedFormEntity(nameValuePairs));
	   	   httpclient.execute(httppost); // send the parameter to the server
	     } catch (ClientProtocolException e) {
	         // TODO Auto-generated catch block
	     } catch (IOException e) {
	         // TODO Auto-generated catch block
	     }
    }
}
layout/main.xml
The interface is simple. Just one button that when clicked triggers
<?xml version="1.0" encoding="utf-8"?>
<LinearLayout xmlns:android="http://schemas.android.com/apk/res/android"
    android:orientation="vertical"
    android:layout_width="fill_parent"
    android:layout_height="fill_parent"
    >
    <Button
        android:text="Toggle LED"
        android:id="@+id/sendButton"
        android:layout_width="fill_parent"
        android:layout_height="wrap_content"
        android:onClick="send"
        />

</LinearLayout>
AndroidManifest.xml
<?xml version="1.0" encoding="utf-8"?>
<manifest xmlns:android="http://schemas.android.com/apk/res/android"
      package="com.yoursite.helloworld"
      android:versionCode="1"
      android:versionName="1.0">
    <uses-sdk android:minSdkVersion="8" />

    <application android:icon="@drawable/icon" android:label="@string/app_name">
        <activity android:name=".HelloWorldActivity"
                  android:label="@string/app_name">
            <intent-filter>
                <action android:name="android.intent.action.MAIN" />
                <category android:name="android.intent.category.LAUNCHER" />
            </intent-filter>
        </activity>

    </application>
</manifest>
Improvements
- Add a database that stores that state of the items you are controlling e.g. on/off , open/closed, hot/cold/warm so that with your phone you can read the state of those devices.
- instead of an Android app, make the interface to your house a website. A website can be access with anything that can open a webrowser not just an Android device.
What are you going to do with it?
